Best AI Tools for Frontend UI Generation from PRDs: 2-Day Comparative Research

This research has been conducted by Halil Algül, Frontend Developer at SHFT working closely with Fabrikatör team.
❗The scope of the following article encompasses only two days of research. The findings are primarily based on personal observations and are therefore subjective. The experiments conducted were limited in scope and do not provide sufficient statistical or scientific data. The results are based solely on small-scale efforts and empirical experiences.
I’m a frontend developer responsible for maintaining stability while upholding high-quality and performance standards in web applications. I work at SHFT, which provides IT solutions to its partners — in this case, Fabrikatör.
This research was initiated to address a growing inefficiency in the AI-assisted workflow. Fabrikatör’s broader goal is to automate as much of the product development pipeline as possible — not just for developers, but across disciplines.
By leveraging AI tools to generate consistent, functional UI directly from product requirements, the aim is to reduce the friction that typically occurs between product managers, designers, and developers. In a conventional workflow, product managers translate ideas into requirements, designers convert those into visuals, and developers build interfaces based on them. Each handoff is an opportunity for misalignment, time loss, or technical debt.
If successful, this research could help bypass some of these steps for certain types of features or prototypes. Designers could be freed from repetitive layout work, PMs could test ideas faster, and developers could avoid redundant implementation cycles — all while keeping outputs consistent with the product’s design system. While the technical implementation falls under frontend development, the potential impact of this research extends to design, product planning, and rapid prototyping on a larger scale.
---
Background & Problem
Frontend development can be complex and often chaotic. The process typically begins when a product manager proposes a new feature. From there, the product manager discusses the concept with a designer, who then evaluates the product’s appearance. They might make changes to ensure that everything meets expectations. At times, they might even abandon the current design if it requires a complete overhaul. After finalizing the design, they create tasks and pass them on to the developers.
The developers then start working on these tasks, but they may encounter issues along the way. When this happens, they consult the product manager for clarification or adjustments. This back-and-forth process continues until the task is completed. To streamline this workflow, Fabrikatör aims to eliminate the need for creating a design specifically for rapid prototype development. To accomplish this, I’ve been tasked with conducting research within a short timeframe, while also proposing improvements to this AI workflow. So,
..expect disappointment, so you’ll never get disappointed”. 🕷 :)
----
APPROACH & SETUP
Demirhan (Fabrikatör’s CTO) helped me a lot initially in directing me to what Fabrikatör wants to achieve here and what kind of tools can provide it. From there, I could further expand my research by choosing the tools to test:
- Claude Code
- Cursor Chat (Auto Mode with no pro request left)
- Copilot (free mode)
- v0 (free and pro)
- Bolt (free version)
- Lovable (free version)
- Polymet (free version)
- Stitch (Earlier called Galileo) (free version)
- Figma (new feature in Beta, but free version)
- UX Pilot (free version)
- Aura (free version)
- Uizard (free version)
Then I decided to share two vital documents with the AI tools. The first one is the Product Requirements Document (PRD) (with 56k characters) for a feature we recently created. The reason is that we have already implemented the feature and its UI, so we know what we eventually want to see. This may seem biased, but we need a comparison for the final output among the tools.
The second one is the Figma designs of the Fabrikatör app, allowing us to adhere to the existing UI standards of the app. These are not the page designs; instead, they are the components to convey the general idea.
----
PROMPT TIERS & TEST METHODOLOGY
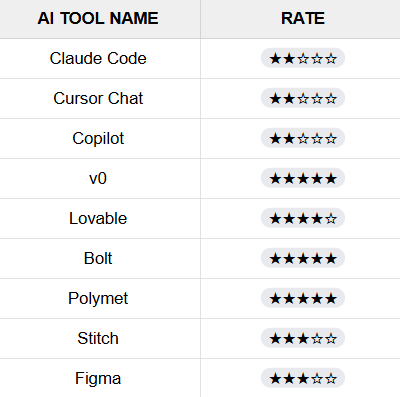
To fairly assess these tools, I tested each one with three different prompts, ranging from minimal context (Prompt 1) to complete, detailed guidance (Prompt 3). Each was rated on a 1–5 scale based on the quality of the result.
After gathering all this information, I began trying them one by one, taking notes as I proceeded and adding screenshots to my Notion. I tried the following prompts multiple times, not just once, and calculated an average for each tool using the prompts. I rated the results on a scale from 1 to 5 (1 being the worst, 5 being the best). Additionally, it is worth mentioning that Claude Code, Cursor Chat, and Copilot have access to the project; they are not entirely unaware of its contents. However, the primary focus here is on creating a UI as outlined in the PRD file, so I have ignored this disparity. These are not single-prompt ratings, but instead, trying the same prompt and checking the outcome as a whole.
PROMPT 1 — Minimal Prompt
In the initial attempts, I didn’t include the second vital information mentioned above. I used as flexible and easy prompts as possible:
Use the file as a source of truth and reference, and create the required UI

**Attached files:**
1. prd.md
PROMPT 2 — Adding Design Context
Afterwards, I tried a similar approach, but this time I included Figma design images. Some changed the outcome for good, some for bad:
Use the file as a source of truth and reference, and create the required UI

**Attached files:**
1. prd.md
2. figma designs
PROMPT 3 — Final Detailed Prompt
Then I further elaborated, and by getting support from the AI, I created the following prompt:
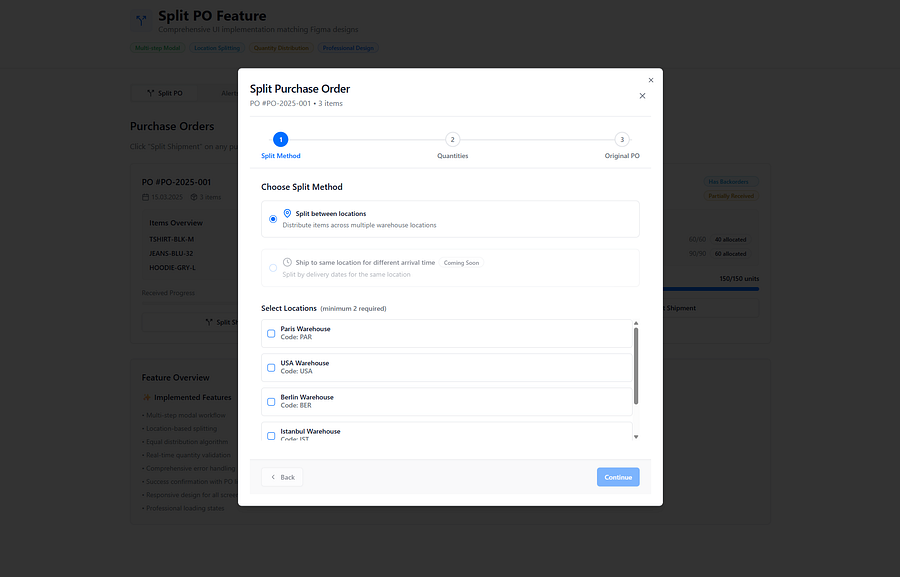
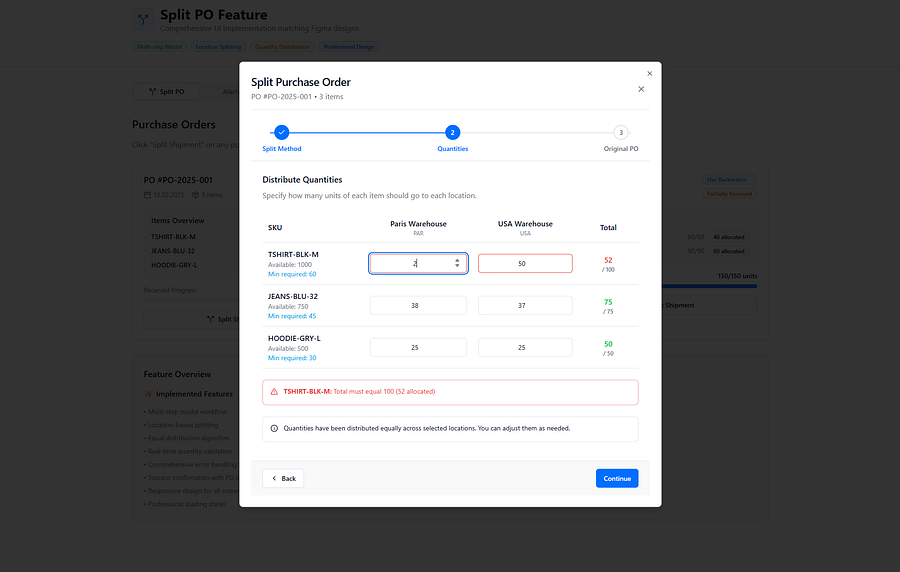
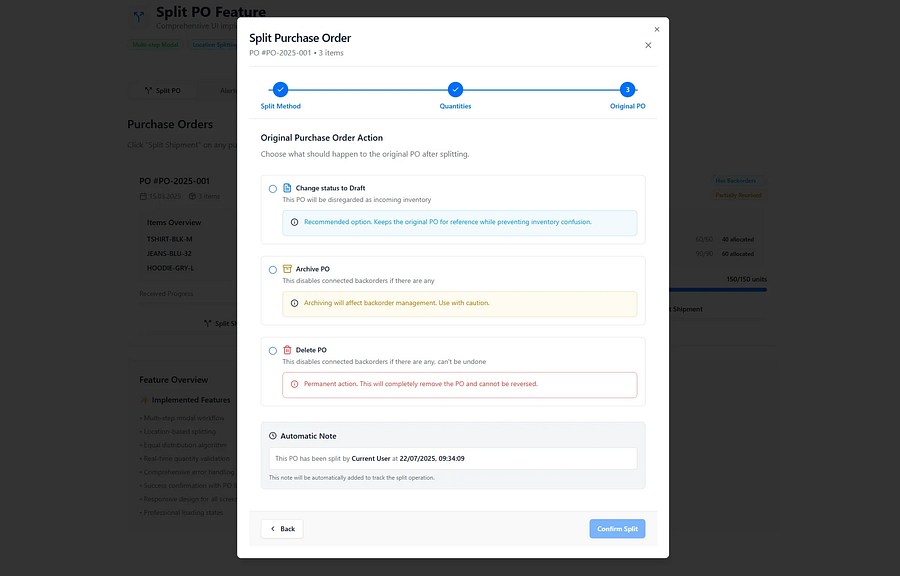
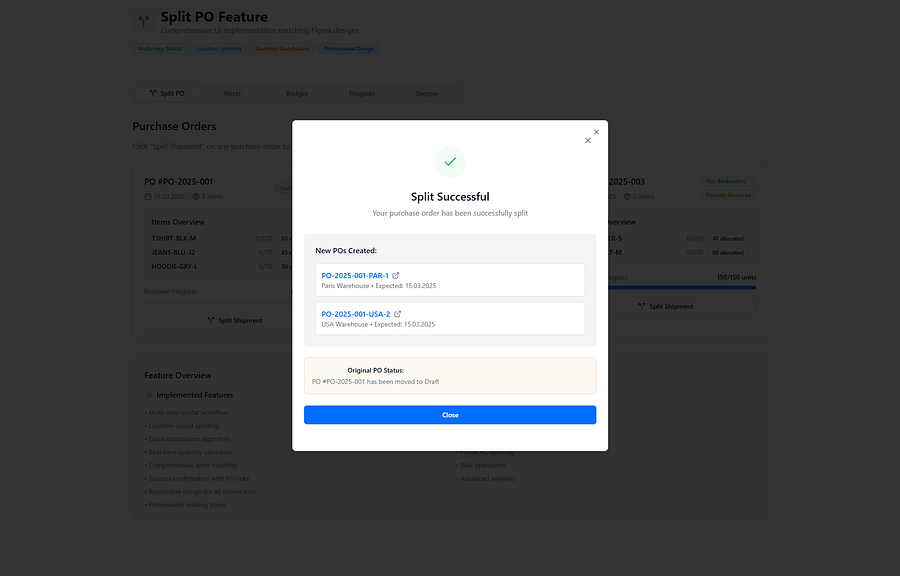
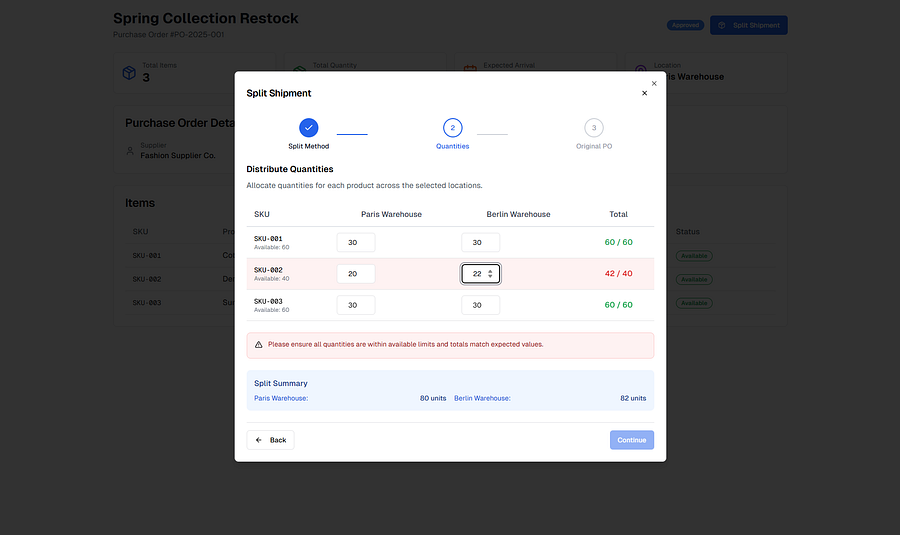
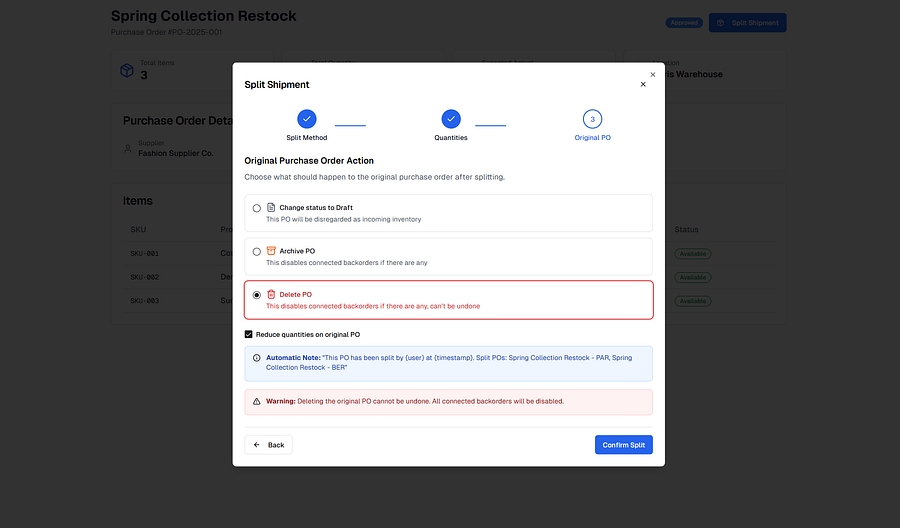
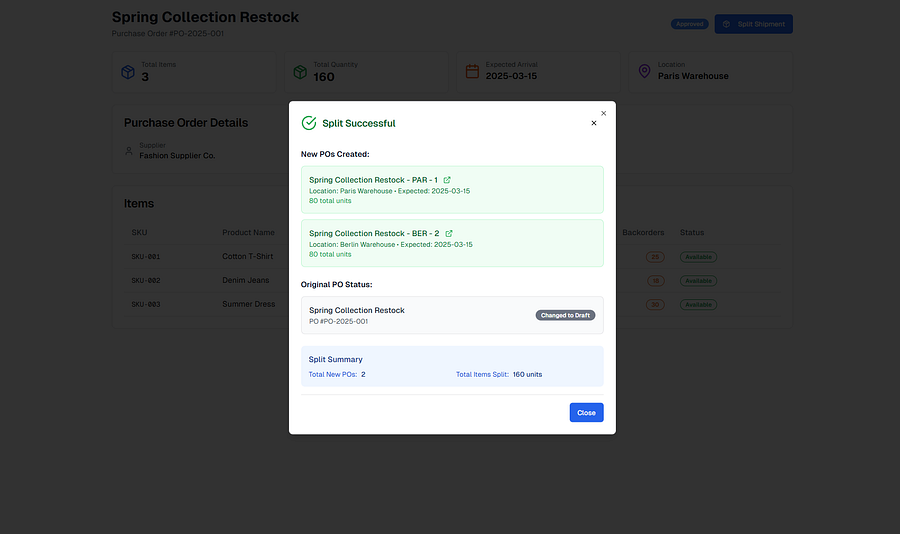
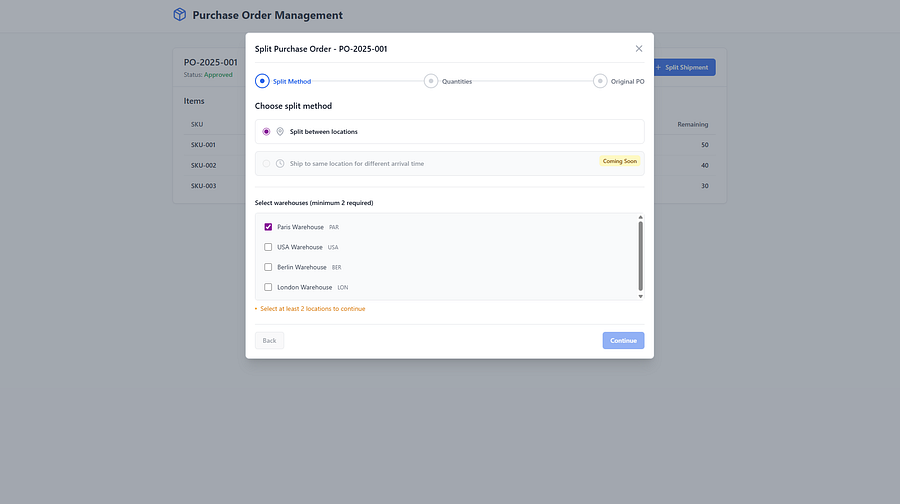
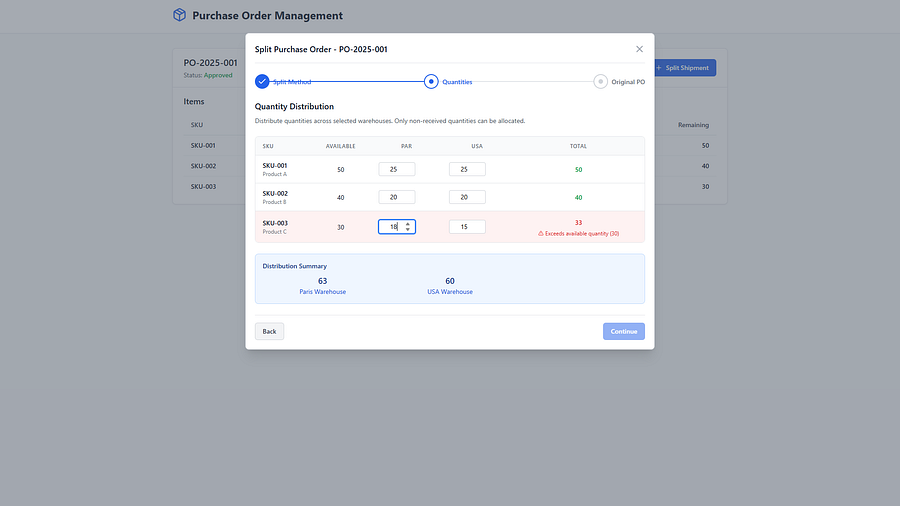
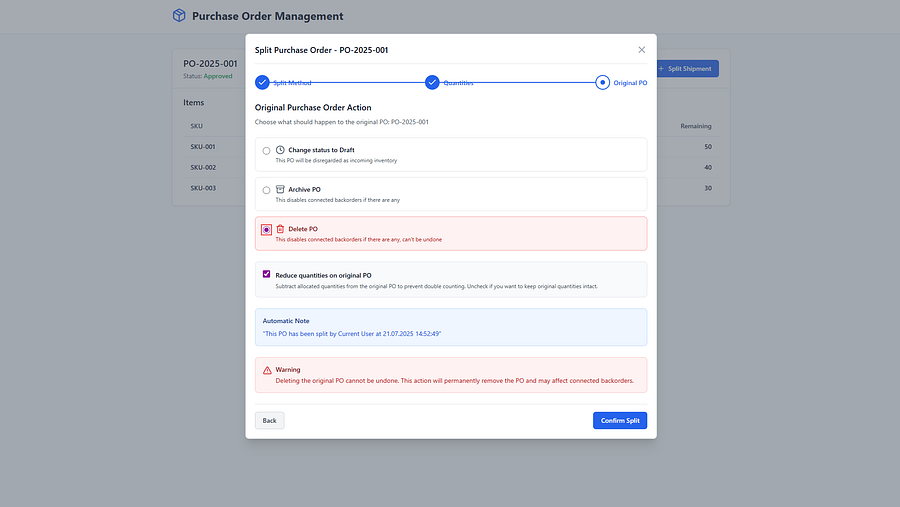
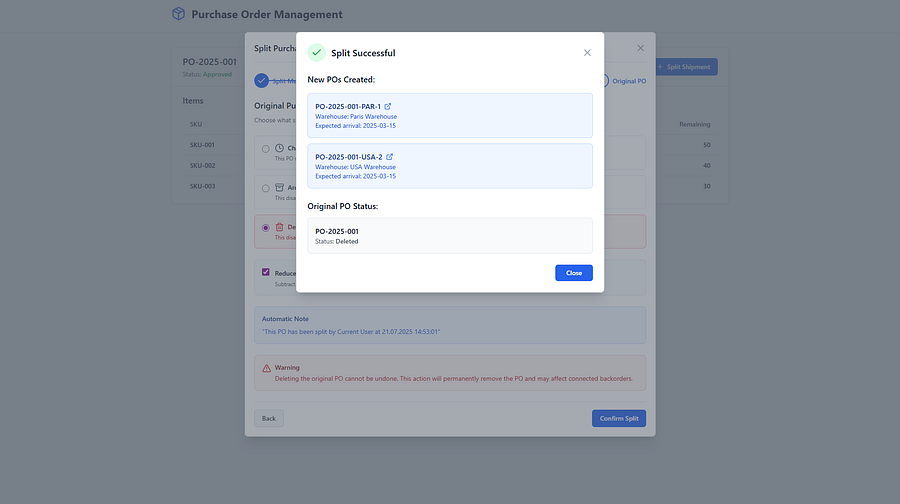
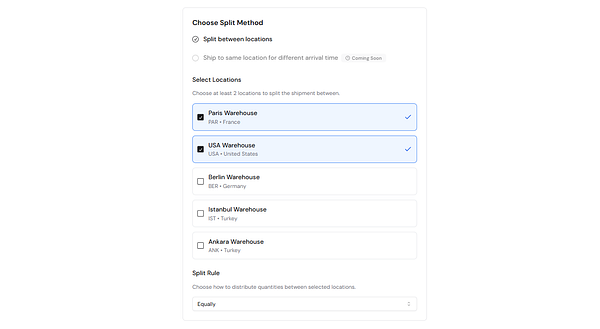
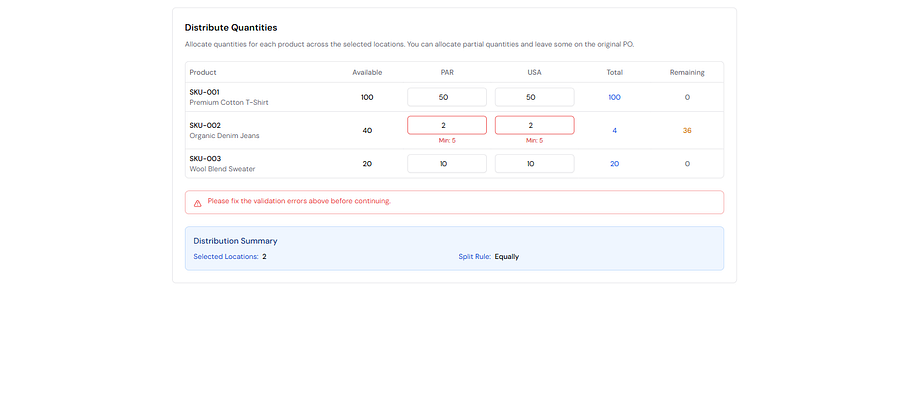
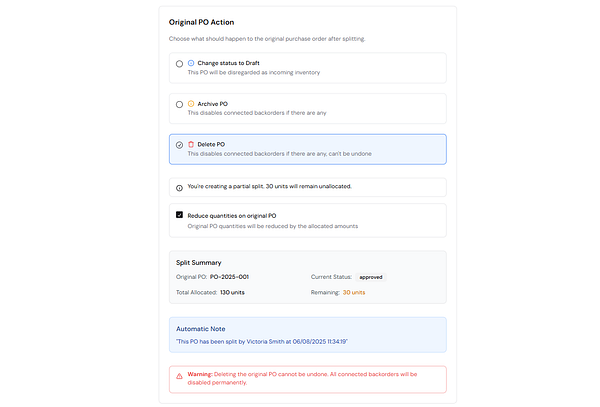
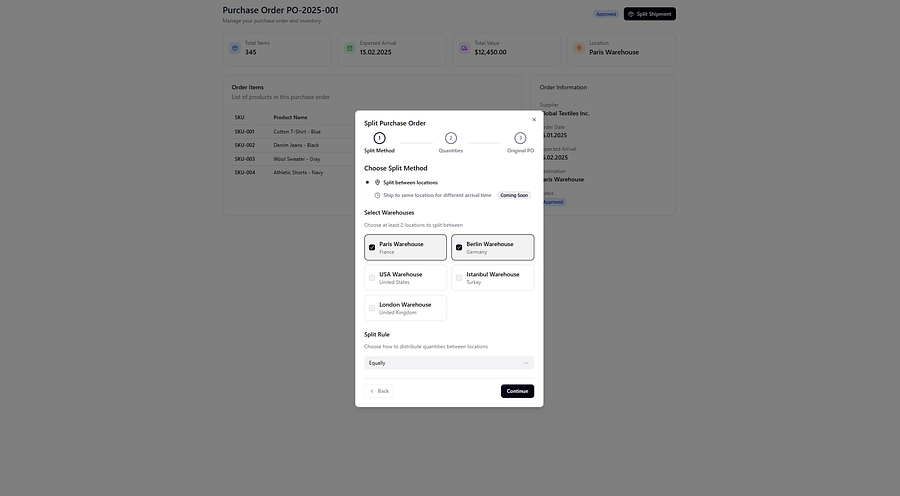
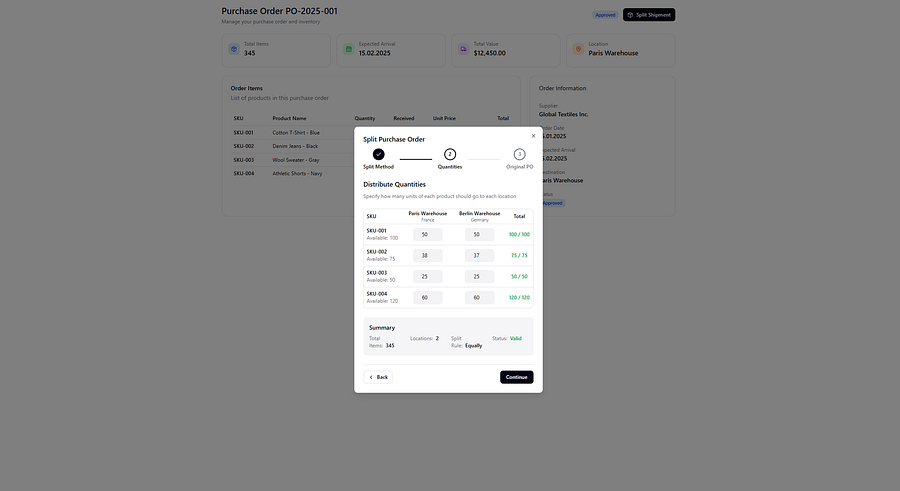
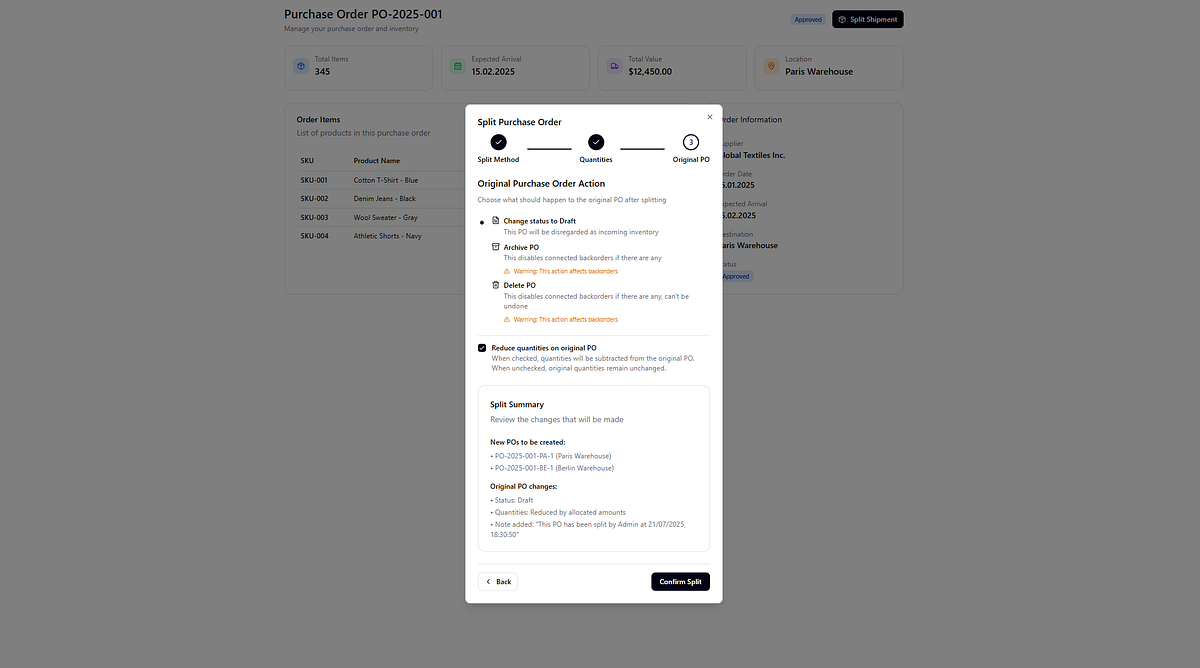
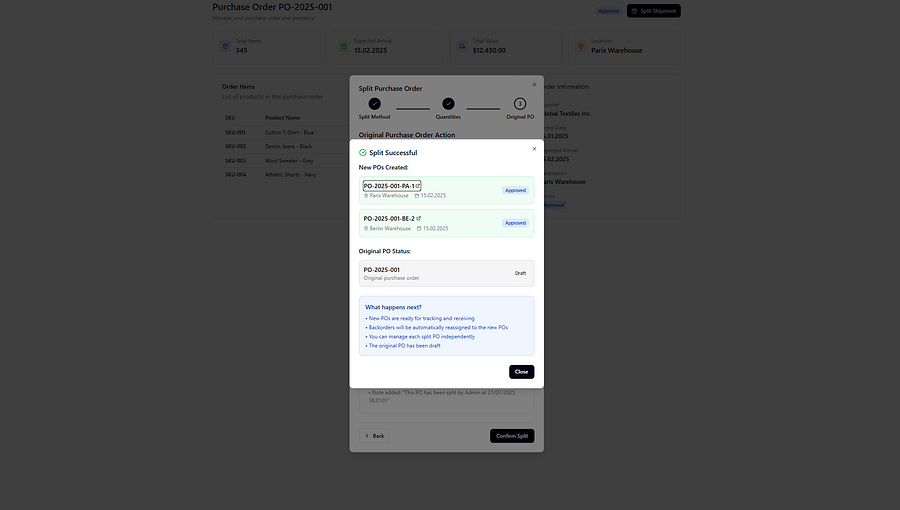
Create a comprehensive UI for the Split PO feature that precisely matches
the attached Figma designs and implements all the functionality described
in the PRD file.

**What I want to see:**
A fully working interface that looks exactly like the Figma designs.
All features and user flows from the PRD implemented and functional.
Professional, polished UI that feels like a real product.
Responsive design that works on different screen sizes
Proper handling of user interactions, form submissions, and data display

**Attached files:**
1. prd.md
2. figma designs
---
TOOL CAPABILITIES & LIMITATIONS
LIMITATIONS
❗️Note: The following tools were excluded from comparison due to testing limitations:
Why are the Aura, UX Pilot, and Uizard not included in the ratings? Because:
- Aura failed to create a working UI (which is not a requirement for full functionality). Despite my numerous attempts, I decided to leave it be in my case. Additionally, adding images is only available in paid versions.
- The UX Pilot required a paid version for adding images, and it also has a character limitation, which hindered me from achieving my desired outcome with the PRD. I could try different PRDs with fewer characters to fit in. Still, the PRD is another way of measuring the outcome in these tests, so I decided not to modify it.
- Uizard creates the prompts screen by screen, resulting in only a button to open a feature. After making a few more attempts, I realized I needed to divide the PRD into smaller pieces and then attempt to create each screen. However, it can produce completely random outcomes, and pages are not even connected in a standardized UI. So I decided to leave it too.
TOOL CAPABILITIES
🟥 Lovable => You can’t pass a file directly; you have to copy and paste the file’s content into the prompt input. You can upload up to 10 images per prompt. Generates codes, but to make any changes, you must upgrade to the paid plans.
⬛ v0 => You can pass files directly. You can upload up to 10 files per prompt. Generates codes; you can modify the generated code without limitations.
🟪 Bolt => You can pass files directly. You can upload up to 5 files per prompt. Generates codes; you can modify the generated code without limitations.
🟨 Polymet => You can’t pass a file directly; you have to copy and paste the file’s content into the prompt input. You can upload up to 3 images per prompt. Generates codes, but to view the code, you must upgrade to a paid plan.
🟫 Stitch => You can’t pass a file directly; you have to copy and paste the file’s content into the prompt input. You can only upload a single image, and this feature is currently available in Experimental Mode. Generates only non-interactive UI.
🟩 Figma => Make feature is in Beta and only available to a limited group of users. You can’t pass a file directly; you have to copy and paste the file’s content into the prompt input. You can upload up to 3 images per prompt. Generates codes; you can modify the generated code without limitations.
---
TL;DR
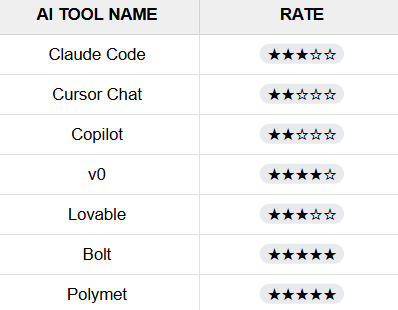
If you plan to use a flexible prompt like: “Monkey asks for food. Give monkey bananas.”, and a detailed PRD (no more monkey here, you must keep it as detailed as possible :) ), then it is best to use 🟨Polymet and 🟪Bolt. ⬛v0 is doing great as well.
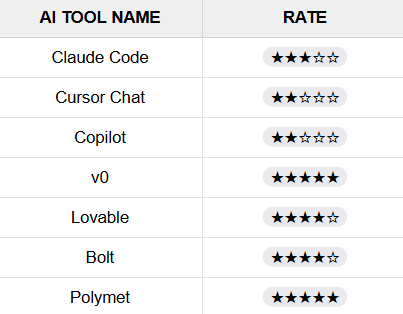
Suppose you already have an application and want your UI creations to be consistent with your app by using design images, while still maintaining a flexible prompt and having a detailed PRD. In that case, it is best to use ⬛v0 and 🟨Polymet. 🟪Bolt and 🟥Lovable are doing great as well.
If you plan to use a detailed PRD, ensure consistency with your app by using design images and providing a detailed PRD to clarify your requirements. It is best to use ⬛v0, 🟨Polymet, and 🟪Bolt. 🟥Lovable is doing great as well.
I found that forcing the tools to use our tech stack produced worse results — likely because they weren’t trained on it. Allowing them creative independence gave better outcomes. Guiding them with proper design images kept consistency without limiting their capabilities. That balance is why my choice is with the last one:
Detailed Prompt + Detailed PRD + Design Images + [v0 / Polymet / Bolt / Lovable] (interchangeable)
So far, these are the results I’ve achieved. This can give you a hint about what is helpful in your scenario for UI creation.
---
TOOL OUTPUTS